Everybody loves taking pictures and most are stored on their cameras or mobile phones. Only a few would want to have them printed (or developed? haha). I have 50 thousand pictures stored on my laptop and PC as well as backed up on a few external hard drives. I never really thought of having them printed. Not until Photobook Philippines changed the game! I came across a voucher that claims it is possible to have a cool, personalized 40-page softcover photobook for only P20. REALLY? Read on.
Below is the summary of expenses.

I made a quick how-to guide to help everyone create their own photobook using their PC or laptop.
- First, let’s get the voucher! Here is the link for 98% OFF Photobook. Original price is P1200, now it’s P20! Sweet isn’t it? (If the link is unavailable, google metrodeal photobook philippines)
- Register at Photobook Philippines.
- Download and install the Photobook Designer for PC. It is also available for Android and IOS (I won’t cover the mobile version though)
- Grab a few readybooks. You can preview these readybooks so you can already get a glimpse of how yours would look like. Make sure you select softcover and Mini Square before downloading. Install these as well.

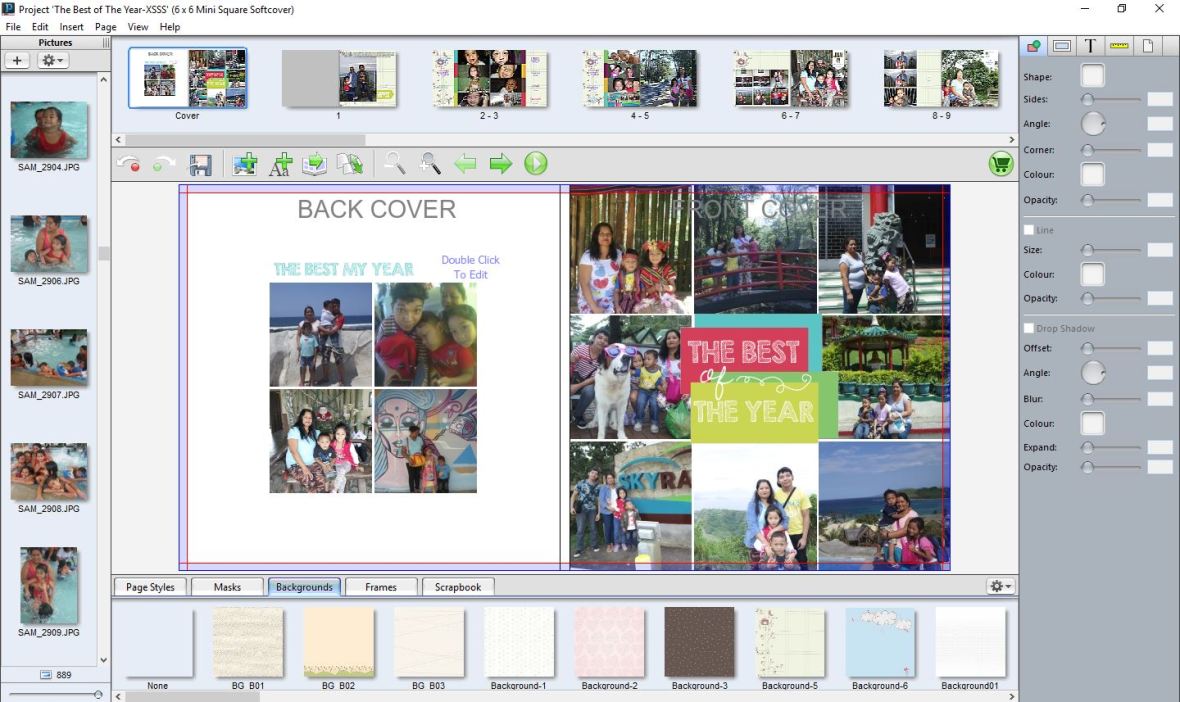
- Open the Photobook Designer.

- Select Open an Existing Project and select your readybook.

- Once you have the readybook open, you can import pictures from your computer or Facebook/Flickr. You can drag and drop pictures from here. You can customize each page and select styles, background, frames and add scrapbook items. Up to you. 😉
- Once done, select File > Check Photobook to see if you missed something (a blank text box or maybe a full blank page!). You should get a No problems found. confirmation once fixed.

- Once you’re done double / triple checking your photobook, select File > Order. Check the box and click Start.

- The order will then be opened thru your browser. First is the My Cart page. It’s still P1,200! Don’t panic! Trust me! Click Continue.

- Next is the Shipping/Billing page. You have 2 options, Express Shipping (P250, 5-7 business days) or Priority Express (P500, 4-6 business days) Click Continue.

- Next is the Payment page. Here you will see the Voucher Code box. Copy and Paste here the voucher you bought from MetroDeal (Step 1). As you can see, from my P1480 bill, it now only P280! Select Confirm Order and pay thru credit card / paypal.


- Once successful, you’ll get to the Order Confirmation page. Take note of your order number which will also be sent to your email.

- We’re not done yet, we have to upload our photobook. Select File > Order. Click Upload Order and hit Continue.

- Your photobook will be uploaded. This might take awhile depending on your internet connection.

- You’ll be prompted once successfully uploaded. You’ll receive a confirmation email as well.

- That’s it! Now for the waiting game! You can track your order here.

Hope it helps! For any questions / comments. Feel free to comment. 🙂


This would be a great help. Thank you!
LikeLike